This information was posted to the 1630 list. Happily, Gina has agreed to let us keep all of this wonderful info as web pages in the FAQ! All the content is Gina's. You can see Gina's web site for more great ideas. (Her web site will open in a new window.)
The booklet Heirloom Stitches can now be ordered from Gina Butler on her web page: http://www.ginabea.com/heirloomstitchesbook.html
This is the expanded, self published version of the brochure which was published by Bernina USA.
Besides the original 25 hemstitches with diagrams and instructions, it includes additional stitches which can be used for decorative and utility sewing.
Note from Ashley: Gina has so generously shared her expertise with us over the years. I'm happy to plug her booklet here. I'll unabashedly do anything I can to keep encouraging her!
Please feel free to contact Gina or the 1630 list with questions or comments.
The contents of this page are copyright © 1998-2011 by Gina Butler. Please contact Gina at: gbokc AT cox DOT net for permission to reproduce any or all of this page. Gina's web site is: http://www.ginabea.com
Contents:
- Introduction
- Lessons Learned
- Make a Stitch Notebook
- Just 5 Minutes a Day...
- Making a Longer Straight Stitch
- Adjusting the Stitch Length and Saving to Memory -- (Saving a design with the desired length/width changes)
- The Quest for
Hemstitches, or 'The Machine Doesn't Bite!'
- Stitches
Introduction
Here's what I learned while creating each stitch. Included will be answers to questions that students have asked during my "Heirloom Stitches" classes.
I made samples of all the stitches for the brochure - but there wasn't room to print them and the instructions. I had wondered if it would have been better to not print so many at one time, so that more info could be shared along with the photos of samples. I was just thrilled for the opportunity to get these stitches into the hands of 1630 enthusiasts and didn't think it my place to change the brochure format. Besides I had 40 or so stitches to begin with - it was hard enough weeding them down to 25! Hopefully, I will be able to scan my samples and post them on my temporary web page. Unfortunately, I was disappointed with the scan that is there of the sampler - I lost some of the finer detail when the page was published on the web. http://ginabea.com
The four hemstitches in the December 1630 Library are from the original seven stitches
that I created in August '95. They are slightly different from the 25 recently
published stitches. I really hope that all of you will find additional variations
and share your findings with the rest of us.
The contents of this page are copyright © 1998-2011 by Gina Butler. Please contact Gina at gbokc AT cox DOT net for permission to reproduce any or all of this page. Gina's web site is: http://ginabea.com
Lessons Learned
Make a Stitch Notebook
For those of you stitching along: Are you starting to have scraps of cotton organdy with odd samples laying all over your sewing area? Sounds like my place! - but let's start now helping you organize these into a sheet for your notebook. In class I have the students stitch on 8 X 10" pieces of cotton organdy. Start on the left side of the fabric with stitch #1 and stitch about 2" at 2.5mm length (remember this is the automatic length at the drawing screen). Now go to the memory screen and change the length to 4.0mm and sew 2 - 3" (you may have different length preferences than I did). You can use a pen or pencil to make notes on the organdy. I draw a circle around the stitch numbers to make them easier to find. I don't take the fabric out from under the foot nor break the threads until I finish sewing that complete line.
A reminder here, to let the machine do the work - don't push or pull the fabric while stitches are forming. ( I usually see this in class with students that have had older non-Bernina� machines : (
Here's a shortcut: After drawing a design, all it takes is a tap of the foot pedal to send the design to the left side of the screen. (keep your eye on the screen - it happens fast!) So just start to stitch! If you make any changes to the design you will then *have* to send it to the left side with the "move design" arrow (at the top/between the screens).
The contents of this page are copyright © 1998-2011 by Gina Butler. Please contact Gina at gbokc AT cox DOT net for permission to reproduce any or all of this page. Gina's web site is: http://ginabea.com
Just 5 minutes a day...
One of the greatest benefits of designing these stitches has been to help me become familiar with the 1630 Stitch Designer. Even 5 minutes spent each day will help you feel more comfortable with this feature of your 1630! (yes! I know this is dangerous - you won't want to leave it to get anything else done!) You don't *have* to learn and do it all the first day! Give yourself time to have fun with this tool!
The contents of this page are copyright © 1998-2011 by Gina Butler. Please contact Gina at gbokc AT cox DOT net for permission to reproduce any or all of this page. Gina's web site is: http://ginabea.com
Making a Longer Straight Stitch
I have mentioned that the stitch length at the drawing screen of the Stitch
Designer is 2.5mm. And that if we make a line that covers two spaces (3 dots) the
1630 will automatically take an extra stitch in the center dot. Well, I wanted to
avoid this happening for several of the designs. I was trying to achieve a
"jump stitch" or at least a longer stitch than what was programmed.
I set out to find *what* was the limit - *where* could I break this rule?! The
answer is "two pixels shy of the dot" - or ONE blank pixel between the
beginning dot and the third dot (covering two spaces) Remember, we are drawing
horizontal lines to get a straight stitch - tilt you head if needed to better
imagine how a design will stitch. : )
(OK! you can stop the jokes about me being two pixels shy of a load!)
To achieve this you don't use the magnetic screen. Then you can stop the drawn lines between the dots. The arrow cursor is made up of pixels - Focus on the last pixel of it's tip as a guide. Some students with mature eyesight have found a magnifying glass helpful. It is crucial that stitch points which share a pixel truly share! If you stop the drawn line even one pixel off - the design will be spoiled. Remember that wherever your line stops - that is where the needle will pierce the fabric. The nature of entredeux and hemstitching is the open holes left in the fabric from stitching repeatedly in the same stitch point. This is a good place to introduce the "Clr" button. It is used to erase a drawn line. Using pixels between the dots takes practice and patience but is well worth the effort for some stitches!
The contents of this page are copyright © 1998-2011 by Gina Butler. Please contact Gina at gbokc AT cox DOT net for permission to reproduce any or all of this page. Gina's web site is: http://ginabea.com
Adjusting the Stitch Length and Saving to Memory
At the drawing screen the stitch length is 2.5mm, *always*. To make a change - take your curser to the "down arrow" and touch "OK". This changes you to the "memory screen" (where you will find 25 blocks that represent drawn and saved stitches or designs) This is also where you will be able to change the length and width of the sewn design. If you go back to the drawing screen, the stitch length will be changed automatically to 2.5mm again. In order to sew at a length of 3.0mm you must be sewing from the memory screen.
How can you save a design with the desired length/width changes? From the "memory screen", change the length/width and test sew to be sure you are pleased with the results. Open a memory (this is the rectangle at the bottom of the screen) and move the cursor to the numbered square that represents the stitch you have changed. When you click on a numbered box, that number will appear in the memory line. Now when you turn off the machine and return later - the changes to the stitch are held in the memory. If you merely go to the saved block, the stitch sews at 2.5mm until you manually change it at the memory screen.
When saving stitches to the memory rectangle (1 - 9), remember that each of these 9 can be sub-divided to hold many more stitch changes. You may want to keep notes about which stitch is actually behind each number as you won't be able to visually see what the stitch looks like. Also remember that if you erase or design over one of the 25 stitches at the drawing screen, the saved stitch with changes will be lost from the 1-9 memory. It's like writing a check - you must have money in the bank(drawing screen) to cover the check (memory rectangle).
The contents of this page are copyright © 1998-2011 by Gina Butler. Please contact Gina at gbokc AT cox DOT net for permission to reproduce any or all of this page. Gina's web site is: http://ginabea.com
The Quest for Hemstitches, or 'The Machine Doesn't Bite!'
I have been on a quest for hemstitches since I had my Bernina� Guide classes in 1979 on the 830. With each new model, my first question was always, "what about a hemstitch?" I wanted a stitch that would mimic handwork without the "work"! : ) (not lazy - just wishing!) When I first saw the capabilities of the 1630, I never thought about more "ducks and bunnies", I thought hemstitches! My first attempts at designing my own stitches were disappointing because I didn't understand how to use the 1630 Stitch Designer. It seemed everything I tried to do to design my own stitches failed. I was trying in vain to copy the way * I thought* other machines formed their stitches. In desperation, I started "pushing buttons" (my 14yr. old son will testify that this is what *usually* gets me in trouble with the computer - but I don't really consider the Stitch Designer a computer - it is a drawing tool). I started playing with the different tools - triangle, circle, square... Which direction will the needle swing? How far will the feed dogs move the fabric? What will just a "blip" on the screen look like when sewn? (Susan Beck of Bernina�, who is the Education Editor, patiently explained that the "blips" were pixels!) The machine doesn't bite! Don't be afraid to make "mistakes" - it's just fabric and a little thread - enjoy it!
The contents of this page are copyright © 1998-2011 by Gina Butler. Please contact Gina at gbokc AT cox DOT net for permission to reproduce any or all of this page. Gina's web site is: http://ginabea.com
Stitches
This is where I learned that drawing in the center of the screen gave me a center needle position when sewing. File this away in your memory - this will come in handy when we want to change the needle position to the left for another stitch.
The contents of this page are copyright © 1998-2011 by Gina Butler. Please contact Gina at gbokc AT cox DOT net for permission to reproduce any or all of this page. Gina's web site is: http://ginabea.com
We can sew hemstitches and entredeaux in one pass by creating a stitch with more movement than a simple zig zag. Using the magnetized dots gives you the accuracy that the needle needs to re-stitch in each hole to open them. To save time - we can use the mirror image feature on the Stitch Designer. The mirror MUST match (no space in the center - not even a pixel!) If your mirror line was not accurate, all you have to do is touch UN. This undoes the last mirror, so you don't have to start over (Thanks Bernina�!).
When you design so something symmetrical (most of mine are) and it doesn't move forward - you can mirror it's image to the right to move the end stitch point. Now you won't just "sew in a circle". Added note for those of you following in the "Heirloom Stitches" brochure: there is not supposed to be a dark vertical line between the X's (these always remind me of jacks!).
The contents of this page are copyright © 1998-2011 by Gina Butler. Please contact Gina at gbokc AT cox DOT net for permission to reproduce any or all of this page. Gina's web site is: http://ginabea.com
Just a reminder for designing on the 1630 Inspiration Plus: You will actually be drawing the stitch on it's side. The left of the screen being the beginning of the stitch and the right of the screen being the end of the stitch. (Just as tilting your head to the left may help you see : ) emoticons - this little trick may help you realize where the needle will swing when forming your new stitches. This will help you make any necessary changes to the length and width.
The third stitch in the brochure "Heirloom Stitches" I called the Double Pinstitch. Carol Ahles did a series of articles for "Creative Needle" magazine and I remember one of them being hemstitches. I think this is where the idea for this stitch came from. It was suggested that you use the pinstitch on your sewing machine and then make a second pass with the mirror image engaged. The 1630 gives us the ability to draw and sew this stitch with a single pass!
Now, my first thought was to draw the pinstitch and simply double it with mirror image. Sorry - but that did not open up the fabric enough. So the lesson is: Some things are worth the extra effort ; ) I found that the needle needed to "step" around the stitch to open up the fabric. Once again, using the magnetic dots (darkened grid) makes this easy to do.
The vertical lines of the design can be as long as you desire. The 1630 will allow the needle to swing 9mm from side to side, no problem (if you sew with a coded foot). Remember that we are drawing designs on their sides ; ) The double pinstitch is drawn covering 2 spaces up and 2 spaces down from center (but this is actually the left/right swing of the needle).
Now, the line that is drawn horizontally (actually the stitch length) is a different story. If you draw a horizontal line covering 2 spaces the 1630 will automatically put in an extra stitch. I don't want this extra stitch in my hemstitch - so I've drawn the line to cover one space. We'll learn to "cheat" this feature with another stitch - it's not really needed with the double pinstitch (for my taste!) Note that the length and width can be changed at the memory screen for your personal taste!
The contents of this page are copyright © 1998-2011 by Gina Butler. Please contact Gina at gbokc AT cox DOT net for permission to reproduce any or all of this page. Gina's web site is: http://ginabea.com
Stitch #4 is pretty straight forward - no surprises here! It was named from looking in a foreign book on hand stitches from the public library.
The contents of this page are copyright © 1998-2011 by Gina Butler. Please contact Gina at gbokc AT cox DOT net for permission to reproduce any or all of this page. Gina's web site is: http://ginabea.com
Stitch # 5 came about by asking...hey! what will the triangle tool do? This is a quick and easy design to draw. I will say that I begin the triangle at the center left - opening the triangle to the right one space and then up two spaces. Using the mirror image saves time - but it is necessary to then mirror the design to the right to move the stitch point. These two mirror images *must* share stitch points - use "UN" to easily undo mirror image if there is even one blank pixel . BTW- do you know what I mean by pixel? They are the tiny squares that make up the screen. Even your cursor arrow is made up of pixels.
The contents of this page are copyright © 1998-2011 by Gina Butler. Please contact Gina at gbokc AT cox DOT net for permission to reproduce any or all of this page. Gina's web site is: http://ginabea.com
#6 This is another fast and easy design but with a very open hole. The stitch in the center will be put in automatically by the 1630(because the design covers two spaces) so you don't have to draw it.
The contents of this page are copyright © 1998-2011 by Gina Butler. Please contact Gina at gbokc AT cox DOT net for permission to reproduce any or all of this page. Gina's web site is: http://ginabea.com

#7 Make sure the mirror image lines up perfectly to share the same stitch points. This design could be trimmed on one side for a picot edge.
The contents of this page are copyright © 1998-2011 by Gina Butler. Please contact Gina at gbokc AT cox DOT net for permission to reproduce any or all of this page. Gina's web site is: http://ginabea.com
This is another design that was sparked from a Carol Ahles article. She suggested using the three step zig zag to make two passes of stitches (and then hope and pray!) (not her sentiments - mine!) that they meet in the center of the rows with a open hole. Well, of course on the 1630 we can "draw" where we want the needle and feed dogs to move! Note that the design should be mirrored above vertically.
The contents of this page are copyright © 1998-2011 by Gina Butler. Please contact Gina at gbokc AT cox DOT net for permission to reproduce any or all of this page. Gina's web site is: http://ginabea.com
Oh! Dear! The printing gremlins got a hold of stitch #9! You will need to
turn the page 90 degrees clockwise for instructions to sew this design properly.
Hey! but I ran excitedly to the 1630 to see what this "error" would
sew! Sometimes serendipity can lead to wonderful surprises! Unfortunately this
was not one of those times : o
SO!
- Stitch point #1 is in the center
- #2 is left
- #3 is top
- #4,6 are right
- and #5 is end.
Try this stitch for attaching lace to the edge of a collar or sleeve. Lay the lace heading on the fabric at the hem line (apx. 1/2" from raw edge - or line the lace edge up with the raw edge of garment). Allow the needle to do the Entredeux stitching on the fabric and the swing of the needle for stitch point 4,6 will "catch" the lace in place. The entredeux will be enough of a finish on the fabric to cut away the excess from under the lace.
The contents of this page are copyright © 1998-2011 by Gina Butler. Please contact Gina at gbokc AT cox DOT net for permission to reproduce any or all of this page. Gina's web site is: http://ginabea.com
The Turkish hemstitch (#10) was taken from a book on hand hemstitching. My machine rendition is *close* but of course not exactly like handwork! The magnetic grid makes this a very easy stitch to achieve. Start the first triangle on the lower left and open two spaces to the right and one space up. Start the second triangle at the top of the first - open up over two spaces and down one space. The design needs an additional line between the triangles from upper left to lower right.
The contents of this page are copyright © 1998-2011 by Gina Butler. Please contact Gina at gbokc AT cox DOT net for permission to reproduce any or all of this page. Gina's web site is: http://ginabea.com
Stitch #11 in the Heirloom Stitches brochure was another "spark" from Carol Ahles. She suggested using the overlock stitch and sewing two passes back to back. This is *way* easier on the 1630! I watched the movement of the overlock stitch and "aped" it on the drawing screen. Note: Don't forget to draw the needed line from stitch point 3 to stitch point 6 to move the stitch forward. I tried several variations of this, and I have one more stitch that did not make the cut to the brochure, but this is the one that was best.
The contents of this page are copyright © 1998-2011 by Gina Butler. Please contact Gina at gbokc AT cox DOT net for permission to reproduce any or all of this page. Gina's web site is: http://ginabea.com
Someone sent me a sketch of the movement of the Elna entredeux and this was the closest I could draw it. I'm not willing to say that it is the exact same as what is on that particular sewing machine because I don't have access to one to assure the stitch length and width is duplicated exactly. But Stitch #12 is workable and is renamed "triple diamond entredeux". (Another stitch that didn't make the cut to the brochure was one "aped" from the Pfaff machine - again working from a sketch) Remember! We can copy any stitch that is available on any other sewing machine and still have our Bernina® quality!
The contents of this page are copyright © 1998-2011 by Gina Butler. Please contact Gina at gbokc AT cox DOT net for permission to reproduce any or all of this page. Gina's web site is: http://ginabea.com
The idea for Stitch #13 "Algerian eyelet" came from a hand embroidery book. Using the wing needle creates an eyelet in the center of the stitch. Consider using a regular needle and perhaps machine embroidery thread for a pretty pattern that is different from any already on the 1630. This would be a fun way to stitch gross grain ribbon.
The contents of this page are copyright © 1998-2011 by Gina Butler. Please contact Gina at gbokc AT cox DOT net for permission to reproduce any or all of this page. Gina's web site is: http://ginabea.com
The "triple entredeux" (#14) is another wider stitch. Of course you can go to the memory screen to change the width to suit you!
The contents of this page are copyright © 1998-2011 by Gina Butler. Please contact Gina at gbokc AT cox DOT net for permission to reproduce any or all of this page. Gina's web site is: http://ginabea.com
The Waltz hemstitch (#15) was named for its rhythm. It's fun to go from one stitch to another and listen to the music they make! Hey! now that you know how to "cheat" the extra stitch point - what if you go back to previous stitches and enhance them with this new knowledge?!? Well, it was just a thought, anyway! : )
The contents of this page are copyright © 1998-2011 by Gina Butler. Please contact Gina at gbokc AT cox DOT net for permission to reproduce any or all of this page. Gina's web site is: http://ginabea.com
The entredeux that was in 1630 Version One was rough as it was programmed - but with a little "tweaking" it was beautiful! I used it with changes to the width and length. Before I got my update I made careful notes of the stitch movement with changes to length and width. Was it with the 3rd update? - Bernina� designed a *new* entredeux for us! Well, I have to admit - I'm greedy! I wanted the old version (with tweaking) *and* the new version. This (#16) is a tricky one to draw! It even takes me a while to get it perfect. Honestly - in class I usually transfer this one from my saved key to students' machines or blank keys. By this time they're curious to see just how easy it is to save some of these designs to a key and free up some drawing screens! If you can achieve the drawing of this one on your own you can be deemed "MASTER OF THE STITCH DESIGNER". Very good for practice! Caution: please walk away from the screen before the point of frustration! If your house is like mine, you've probably got laundry calling anyway! : )
How about skipping to #17 for an easier version of this lesson (I wanted the 1630 entredeux to be number 16 - get it?!? silly, I know!) See below for details...
The contents of this page are copyright © 1998-2011 by Gina Butler. Please contact Gina at gbokc AT cox DOT net for permission to reproduce any or all of this page. Gina's web site is: http://ginabea.com
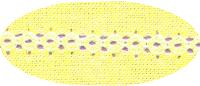
The lace edge hemstitch is one of the fastest stitches to sew out as well as being fairly easy to draw. You will get the effect of entredeux to lace without the expen$e of entredeux (Sorry, you still have to buy lace! Unless you make your own with decorative stitches on water soluble stabilizer.) This is a much quicker method as well. No, it may not be considered truly heirloom quality, but is very useful for many of your day to day projects. Consider this technique when adding lace to the hem of doll dress or a little girl's slip, or on a cotton organdy collar, or.......anywhere you need a fast and pretty entredeux stitch!
The contents of this page are copyright © 1998-2011 by Gina Butler. Please contact Gina at gbokc AT cox DOT net for permission to reproduce any or all of this page. Gina's web site is: http://ginabea.com
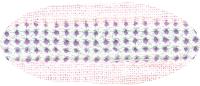
I know you're out there...I can hear you stitch'n! (Same as breathing isn't it?!??!) On the Bernina® fan club list someone was asking how to hemstitch on the edge of fabric to crochet into. Well, our next two stitches were designed with this very thought in mind! They're drawn without the magnetic dots, so that they take advantage of a longer distance between the holes.
On stitch #18 (Rolled Edge Hemstitch) you will want to draw below the center of the screen, in order to change the needle position(left) when sewing. The wing needle will make the "holes" in the single layer of fabric and just pierce the edge of the roll of fabric with the right swing of the needle. I have mine drawn on the second row from the bottom of the screen. Bernina® makes several Hemmer feet, to accommodate different hem widths. This is a pretty edge finish for garments just as it is. I have used it to hem a linen jabot - didn't even add lace!
The Hemmer feet are not coded - but don't let this bother you - the stitch is drawn to be used with any of them.
The contents of this page are copyright © 1998-2011 by Gina Butler. Please contact Gina at gbokc AT cox DOT net for permission to reproduce any or all of this page. Gina's web site is: http://ginabea.com
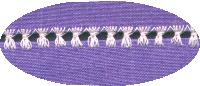
If you look in the right hand corner of the "Heirloom Stitches" brochure cover, there is a piece of pink linen with a French Rolled Edge (#19) and tatting. If you've tried French Sewing by machine (Heirloom Sewing) you know about rolling and whipping with a zig zag stitch, using your #30 Pin tuck Foot (Thanks!! Mary Lou Nall !!!). This stitch allows you to crochet or tat right onto the edge of the fabric.
What about corners? (You think I don't know what you're thinking?!?!) I slightly trim the corners before stitching. This will take practice (what doesn't?!?) but remember that you are adding a handmade lace of some sort and you can manipulate any "pokeys" of raw edges under the crochet or tatting - there won't be many - I promise!
A recent piece I did for my tatting tutor was a round hankie. (Judi Banashek - she's more than a teacher she's a genius! Down right SCARY! and I've told her so myself!) She paid $18 for a 5" round hemstitched linen hankie at a lace fair, acckkk!, and wanted more round hankies to tat the edges for her daughters. When I tried to roll the edge it came out all "ripply" because of the bias around the circle. Here's how I solved it: I took a 6" square of linen and a piece of water soluble stabilizer. I drew a 5" circle on the stabilizer and straight stitched with 2.0 length - using WASH AWAY Basting Thread in the needle and bobbin (I don't always put this basting thread in the bobbin as well as the needle, but I didn't want ANY extra floating thread to spoil the effect.) I trimmed the excess fabric REALLY close to the stitching. I made a slit in the WSS and turned the hankie right side out. Next, I set the machine with the French Rolled Edge stitch (#19) and 80 -100 wt. cotton in the wing needle and bobbin. The stitch rolled the fabric up and over toward the WSS (the linen is facing the feed dogs). "With luck and clean living..." you will probably be able to end in the same hemstitch hole you started.
The contents of this page are copyright © 1998-2011 by Gina Butler. Please contact Gina at gbokc AT cox DOT net for permission to reproduce any or all of this page. Gina's web site is: http://ginabea.com
Now that we know how to "cheat" the stitch length, let's use it to our advantage. The "four sided hemstitch" is drawn quickly using the square drawing tool. Drawing in the center of the screen gives you a center needle position. Note that the grid is NOT magnetic - we will be stopping the square before it completely covers two spaces to the right (remember, this is actually the stitch length : ) Take the square 2 spaces up (3rd dot) and over stopping TWO PIXELS shy of the third dot to the right. This will give you a longer stitch length (without the 1630 adding an additional stitch). Remember if we take the square to full two spaces (three dots) the 1630 adds an additional stitch. Drawn in this way, it is not necessary to increase the stitch length. This screen gives you a "default" length of 2.5mm and is fine for sewing this design.
The contents of this page are copyright © 1998-2011 by Gina Butler. Please contact Gina at gbokc AT cox DOT net for permission to reproduce any or all of this page. Gina's web site is: http://ginabea.com
Stitch #21 is the Arrow hemstitch. Again, we are drawing without the magnetic dots, stopping 2 pixels shy of the 3rd dot (almost covering two spaces). Stitch point #1,#3, & #5 share the pixel that is the second pixel from the dot (one blank pixel between). These stitch points must be exact, so that the needle goes into the same hole repeatedly. The same is true for stitch point #2 and #6 - the needle needs to stitch in the exact same hole. Use the mirror tool to save drawing time. Note that you must also draw a line from stitch point #5 to #6 to move the stitch forward. I like this design stitched at a length of 3mm. Take your curser to the "down arrow" to get to the memory screen and then change the length. Remember that if you go back to the drawing screen the stitch will be changed back to 2.5mm.
The contents of this page are copyright © 1998-2011 by Gina Butler. Please contact Gina at gbokc AT cox DOT net for permission to reproduce any or all of this page. Gina's web site is: http://ginabea.com

Number 22 "Double Stitch Entredeux" is actually one of the original 7
designs that I settled on to teach others to use the Stitch Designer. It is a
difficult one to draw for those with mature eyesight. (No - we don't start here in class
either, even though it was one that helped me "see" how I wanted the stitches to
be formed!) Note that the design is drawn at 27mm and no grid. Use the
triangle tool and begin drawing in the center of the screen. The cursor arrow will
be pointing SE - drag the triangle to the left and then up until there are ONLY
three pixels above the bottom line of the triangle. (Dragging the triangle to the left
merely makes the design easier to see) Sorry, but this needs to be
exact. Mirror below the triangle - sharing the horizontal line of the
triangle. Then mirror to the right - sharing the last pixel on the right side
(this moves the stitch forward). Again, this needs to be exact. Remember to
use the "UN" function to remove any mirror image that you are not pleased with
(Boy! could I use one of those on the mirror in the A.M.!) This entredeux is best
sewn at 4mm. Do this from the memory screen.
The contents of this page are copyright © 1998-2011 by Gina Butler. Please contact Gina at gbokc AT cox DOT net for permission to reproduce any or all of this page. Gina's web site is: http://ginabea.com
What does this button do? .... Let's play with the circle tool. Stitch #23 "Round Hemstitch" in the brochure Heirloom Stitches is one that you won't find on any other sewing machine (at least that I'm aware of!). It makes a very unusual and pretty pattern in the fabric. This was another of my early stitches - a little tricky to draw - but I think it's worth the effort! Note that the stitch is designed at 27mm. This is the default setting for the Stitch Designer. On previous stitches when the instructions mention 9mm - you have to manually change to that setting.
Before the circle tool makes a circle - it starts as a square on point or a diamond shape. Start drawing in the center of the screen and expand the diamond(circle) - pulling it to the upper left - until it has only four pixels on each side. Use the mirror image to duplicate the diamond on top of itself - make sure a pixel is shared between these two! If you leave a space the stitch will not be exact - use the UN function to erase the "offending" mirror image. Now mirror to the right to move the stitch forward. Again, the mirror image must share pixels with the points of the first two diamonds. The 1630 will add a line in the center of the drawn stitch - this is fine - don't bother to try to remove it.
Here's today's lesson: When you design at any width above 9mm the 1630 won't allow you to reduce the sewing WIDTH from the memory screen. (Place your cursor on the down arrow at the bottom left of the drawing screen to save the stitch and move to the screen that allows you to change the stitch length and width. Remember the set length at the drawing screen is always 2.5mm.) Can we cheat this? You Bet!!! : ) You might want to sew this stitch (or others) out smaller than designed. At the memory screen engage the double needle icon. This will reduce the stitch in proportion. You can reduce the stitch even smaller by touching this icon again for 3mm, 4mm, 5mm and 6mm. Set the length at 4mm and sew! This is a very pretty decorative stitch that you could use to make your own "hand looms". Being able to change the size of the pattern just makes this stitch more personalized! Make it yours!
If you decide to draw this at 36mm - you don't have to start over! Go back to the drawing screen and change from 27mm to 36mm. I mentioned early last month that there was no need to take your cursor "over the bridge" to the center top arrow to transfer the design to a stitch. That is still true for a design the first time it is drawn. Just a tap of the foot pedal sends the design into stitch "mode" (merely saves a step - we're not lazy - just have much to accomplish!) *BUT* if you make ANY changes to the design (such as we are doing to change from 27mm to 36mm) you MUST then take the cursor to the arrow at the top of the screen and touch "OK". If you don't, the 1630 won't realize that you have made a change. It is a wonderful machine but it can't read your mind!! : )
The contents of this page are copyright © 1998-2011 by Gina Butler. Please contact Gina at gbokc AT cox DOT net for permission to reproduce any or all of this page. Gina's web site is: http://ginabea.com
back to the top
The last of the wing needle stitches in the brochure is #24, Fil Tire. Pronounced: fil (ryhmes with pill) - teeray (not "fill tar" as we say in OKlahoma! that's what you do when putting air in your car tires<g>) This stitch is designed at 36mm - why? because we can! You won't need a grid , and you will use the square tool to draw this one. In fact, on stitches 22, 23 & 24 the grid will only make accuracy more difficult! (I really wasn't trying to be a "pain" with all of these changes - but I saw these stitches as exercises to help the student learn to use the Stitch Designer - the resulting entredeux/hemstitches are just icing on the cake!) For a center needle position when sewing, start the square apx. 2 dots below the center of the screen. The cursor arrow points inward from the northeast corner of the screen, so start the tiny square and "pull" it left and then up(merely makes the tiny square easy to see) until there are four (4) pixels on each side. The instructions say,"use the freehand drawing tool to draw a diagonal line from the lower left to the upper right corner" of the little box. As in earlier stitches, this must be exact. Pixels must be shared in order for the needle to re-enter the previous holes. This can be difficult for beginning students of the Stitch Designer to accomplish. Here's a little trick that I show in class:
Use the freehand drawing tool to draw a diagonal line that is four pixels high like a stair step. This can be out to the side, anywhere on the screen. Now use the "Move Line" function to move the line into place from corner to corner in the little box. The move line key has 2 arrows moving in opposite directions. Very similar to parallel parking but easier! : )
Now, mirror the little box above itself (sharing the top line of the box). And again, mirror the (now) two boxes on top (also sharing the top line of the previous box). Mirror the whole rectangle to the right. Go to the memory screen to change the stitch length to 3.0mm and sew! This is pretty with a single row or you can sew a second pass by lining up your needle in the top right needle hole and using your "Pattern Begin" function. Use this stitch to create your own hand looms or do a repeat section of it to applique to fabric (cutting away the under layer of fabric once the fil tire' is in place). This is a good time to remind you to sew with the finest cotton thread you can obtain. Madeira USA markets a cotton bobbin thread that is about a size 100, that I use in class. I purchase it on large cones and fill bobbins for student's use - one to use through the needle and one for the bobbin case. A note to teachers: To save class time - I spin the bobbins at home and have the students bring two EMPTY bobbins to class to trade for the bobbins with thread. Also, check out Madeira 80 wt. cotton thread. You will find this in pastels as well as black, white and ecru.
This was another "early" stitch - before I learned to "cheat" the length by designing between three dots. For classroom purposes, I took each of the original 7 stitches and designated them to 9mm, 18mm, 27mm, 36mm or 45mm. Remember that some of the stitches in the brochure are meant as "sparks" for your imagination. You can change them to suit yourself! Please share your findings with someone else - it is SO MUCH fun for us all! I haven't taken time to play with it - but, what if *you* redesign this stitch on a larger scale? What will you get? It's thoughts like this that send me racing to the 1630 to play!!! : )
The contents of this page are copyright © 1998-2011 by Gina Butler. Please contact Gina at gbokc AT cox DOT net for permission to reproduce any or all of this page. Gina's web site is: http://ginabea.com
back to the top
Faggoting is the term traditionally used for joining two fabrics with open embroidery stitches. The fabrics need to have finished edges, such as a fold. Rouleaux tubes can also be joined with faggoting. Space the folded edges of the two fabrics approx. �� apart under the foot. Use a flat coffee stirrer as a spacer.: )
This stitch was designed to have the appearance of the Bernina �favorite� faggotting stitch, which was done with the fringe foot. The thread that went from each bundle to the next always bothered me. I drew this stitch taking the final bundling stitch back to the fabric edge.
The contents of this page are copyright © 1998-2011 by Gina Butler. Please contact Gina at: gbokc AT cox DOT net for permission to reproduce any or all of this page. Gina's web site is: http://www.ginabea.com
All of the pages under the http://www.AshleyCaroline.com directory, including http://www.AshleyCaroline.com/sewing/1630, are � copyright 1997-2011 Ashley Engelund. Permission is granted to freely copy these pages, unmodified, in the 1630 FAQ (the most up to date versions from http://www.AshleyCaroline.com/sewing/1630) in electronic form, or in print
if you're NOT selling it or using it for commercial gain.